


Introduction
Welcome to the series of "JavaScript Projects for Beginners". This series is intended to help you complete multiple JavaScript projects with the help of thorough, step-by-step guides. In the first post for this series, we will focus on building a simple to-do list web application. If you're just getting started in JavaScript or finding JavaScript boring (trust me, it isn't) and too complicated at times - try your hands on building this fun project to practice your skills and create something useful at the same time. So, let's get started!
Pre-requisites
To build this project, you need to be familiar with basic HTML5 concepts like different HTML elements and their attributes, basic user interface styling using CSS and basic JavaScript knowledge on variables, data types, functions, event handlers and the concept of DOM and DOM manipulation using JavaScript. If you're not familiar with any of the concepts mentioned above - you can refer to these linked resources and plenty of others found on the web. Also, once you start coding through this step-by-step guide - make sure to refer to the documentation to understand any concept which you find difficult to grasp.
You can build this project either on your local machine with any code editor of your choice (I use VS Code Editor), or in online code editors like Codepen etc. For now, we will focus on building locally.
Step 1 - Setting Up the Project
A. Create a New Project Directory
At first, create a new directory for this project with a suitable name (e.g. - todo-list-project) anywhere you want. You can create it either from file explorer (easiest) or from the CLI (Command Line Interface) like this -
mkdir todo-list-project
and then navigate to the directory -
cd todo-list-project
B. Setting up the HTML file
Open any code editor like VS Code and open the folder you created. Create a new file named index.html (you can name it anything you like but it's good to stick to the conventions). Then build a skeleton structure of an HTML page at first with all important tags -
<!DOCTYPE html>
<html>
  <head>
    <meta charset="UTF-8">
    <title>To-Do List</title>
  </head>
  <body>
    <!-- add user interface elements here -->
  </body>
</html>
C. Setting up the CSS and JS files
In the same folder, create a file named style.css for the styling of your web page. Add another file named app.js to add the JavaScript-enabled interactive functionalities. Keep them empty for now.
D. Linking CSS & JS files to HTML
Inside the head tag of the HTML document, add a link tag to link your CSS file -
<link rel="stylesheet" href="style.css">
Now, let's link up our JS file with a script tag -
<script src="app.js"></script>
Now our HTML looks like this -
<!DOCTYPE html>
<html>
  <head>
    <meta charset="UTF-8">
    <title>To-Do List</title>
    <link rel="stylesheet" href="style.css">
    <script src="app.js"></script>
  </head>
  <body>
    <!-- add user interface elements here -->
  </body>
</html>
Note that we created only a single directory for this project as it contains only three files. For bigger projects, we need to specify the relative path clearly in the href and src attributes.
Step 2 - Building the User Interface
A. Add a div Element
Think what a to-do list needs. You need to have an input field to enter a new task name and a button to add the new task to your list. An example can be -
<div>
      <h1>My To-Do List</h1>
      <input type="text" id="input" placeholder="Enter a task">
      <button type="submit" id="add">Add</button>
</div>
You can use a form or section tag to wrap this as well. Since this is a simple project, it won't matter much what you use. But if you use form, you may face an issue of default form submission when you click the button and will need to use an event.preventDefault() in your event listener to avoid issues. You can put an id and class attribute for these as well - which will be useful while adding styling and JS functionalities.
B. Displaying the List
Now we need to think about how we can display our list. We can achieve this by using a ul element to contain the list -
<ul id="task-list"></ul>
At this point, the web app looks like this -
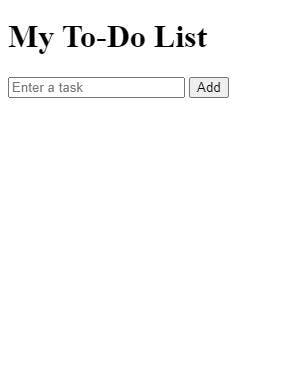
Note this list will be empty at first, as we have not added anything yet. This brings us to the next step - how do we add items to this list?
C. Using JavaScript to Add New Tasks
To add interactivity, we need to access the DOM node which we wish to change in the event of a mouse-click on the button. We can accomplish this by using either document.getElementById("task-list") or document.querySelector('#task-list'). Similarly, we have to access the button with id= "add" and the input text field with id="input". You can use either an event listener or set the onclick attribute of the button to a specific function.
<button type="submit" id="add" onclick="addTask()">Add</button>
Now, let's frame the JS function addTask -
function addTask() {
  const taskInput = document.querySelector('#input');
  const taskList = document.querySelector('#task-list');
  const task = taskInput.value.trim();
  if (task !== '') {
    const li = document.createElement('li');
    li.textContent = task;
    taskList.appendChild(li);
    taskInput.value = '';
  }
  else {
    alert("Enter a valid input!);
  }
}
This code selects the task input and the ul element using document.querySelector(). When the button is clicked, the function gets the value of the task input field and creates a new li element with the task text. Finally, it appends the li element to the ul element and clears the input field.
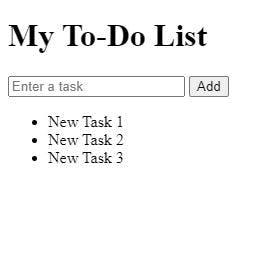
Clever work so far! Now you can add tasks to your nice little list. Let's see if we can make this more interactive with added functionalities.
Step 3 - Adding Interactivity
A. Marking Tasks as Completed
To make our to-do list more interactive, we can add the ability to mark tasks as completed. We'll use JavaScript to add an event listener to the ul element that listens for click events on the list items. When a list item is clicked, we'll toggle a completed class on the item to visually indicate that it's been completed. Let's see how we can do this -
.completed {
  text-decoration: line-through;
  opacity: 0.5;
}
const taskList = document.querySelector('#task-list');

taskList.addEventListener('click', function(event) {
  const taskItem = event.target;
  if (taskItem.tagName === 'LI') {
    taskItem.classList.toggle('completed');
  }
});
Here we are selecting the ul element using document.querySelector() and adding an event listener to it that listens for click events. When a list item is clicked, the code checks if the clicked element is a li element, and if it is, it toggles the completed class on the element.
Now let's see how it looks -

B. Removing Tasks
Now let us add the ability to remove tasks from the to-do list. We'll use JavaScript to add an event listener to the ul element that listens for click events on a remove button next to each task. When the remove button is clicked, we'll remove the corresponding list item from the to-do list. Let's modify our previous JS code a little -
const taskList = document.querySelector('#task-list');

taskList.addEventListener('click', function(event) {
  const taskItem = event.target;
  if (taskItem.classList.contains('remove')) {
    taskItem.parentElement.remove();
  } else if (taskItem.tagName === 'LI') {
    taskItem.classList.toggle('completed');
  }
});
This code adds an if statement to check if the clicked element has a remove class. If it does, it removes the parent element (the li element) from the to-do list. We've also added a remove class to a remove button that we'll add to each list item in the next step.
C. Adding a Remove Button
To add a remove button next to each task, we need to modify the li element creation code to include a remove button (see inside addTask() function) -
const li = document.createElement('li');
li.textContent = task;
const removeBtn = document.createElement('button');
removeBtn.classList.add('remove');
removeBtn.textContent = 'Remove';
li.appendChild(removeBtn);
taskList.appendChild(li);
taskInput.value = '';
Here we created a button element with a remove class and appended the button to the li element which in turn gets appended into the ul element. Now let's see what our to-do list looks like -
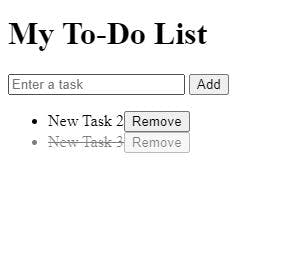
Wonderful! Now we can check off a task already done and remove any task we want. You built your own web application!
Step 4 - Adding UI Styling
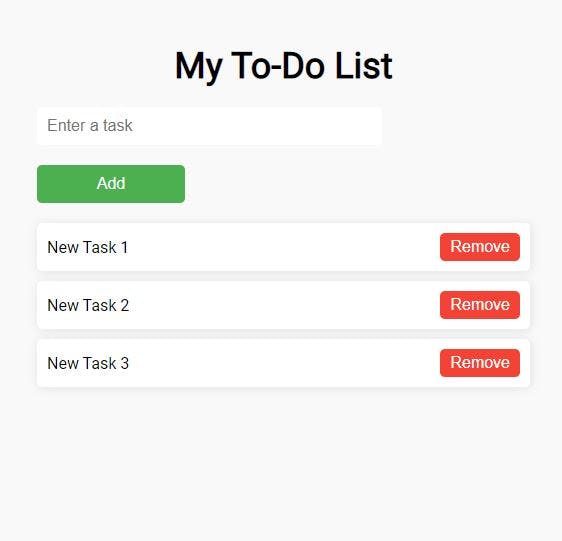
I know most of you will be thinking why I am avoiding the UI styling part for so long. That is because I wanted to focus on the JavaScript interactive functionalities first and clear various concepts of JS along with our hands-on project. Also, I want you to experiment with this (I know this is fun for all!). I added a little bit of styling to make it like this -
Conclusion
Wonderful job! You have created a nice, simple to-do list for yourself and put lots of your knowledge into building something useful. I am linking the CodePen project link for your reference and also my own deployment of a simple list. Feel free to add your own styling to your list. Also, try adding some more functionalities to your list - like marking a task important or enabling the removal of tasks only after checking them off etc. Play around, have fun and don't forget to take a well-earned break. See you in the next project!